Additional Information:
The benefit of using forms is that it allows you to exercise greater control over how a user interacts with a spreadsheet. This is clearly useful when developing sheets for other users, but it can also be beneficial when creating your own files.
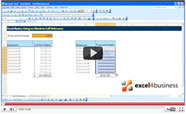
The first step towards creating a form is to insert a form into the VBA project window. This is covered within the video. If you do not see the controls toolbox when you click in your blank form, you can select Toolbox from the View menu.
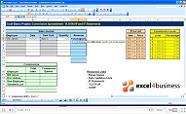
When you begin to add items from the toolbox into your blank form, you will be able to edit their properties in the Properties window (View->Properties Window). In this module, we demonstrate how to enter code names for each field we create. However, you can see that a simple text box has over 40 properties and we have not covered them all in this module.
These properties are all terms in Visual Basic. Therefore, txtBox.Height will return the height property for the field named txtBox. Note that the codename, txtBox, is entered in the "(Name)" field of the Properties window. The parentheses indicate that this is the one property that cannot be referred to by code.
The other important properties at this stage are Font, WordWrap, Multiline, Value, TabIndex and Enabled. Font lets you select the font size and type, as you would within Excel. WordWrap and MultiLine will allow text to run over multiple lines, similar to the Wrap Text option within Excel. Value is self-explanatory but needs to be referenced by Visual Basic if we are to extract data from our form.
TabIndex lets you select the order in which the cursor moves between fields. When constructing a form, you would generally want to complete it from top to bottom so you would give the first input field a TabIndex of 0, and increment this by 1 for all subsequent fields. Visual Basic will automatically re-assign TabIndexes if you enter duplicates. Note that if you progress to using Frames, the rules change slightly.
Enabled is a very simple command. If you set it to False, a field becomes inactive. Imagine a database of names and addresses, and that you have created a form in which users can edit a given name's address. Since you do not want the name to be changed, you can display the name in a text box where Enabled is set to false. You could also display the name as a label, but there will often be practical and aesthetic reasons for using a text box.
This module makes use of the "Me" notation to refer to our form. This only works because we are writing the code within the frmInputs code module. In other modules, we would have to refer to the form by its code name as in the instruction, "Load frmInputs". Note that "Me" always adopts the name of the code module, as observed in the Project Explorer. Therefore, if you are writing under ThisWorkbook, then Me.Save would be an instruction to save your file.